
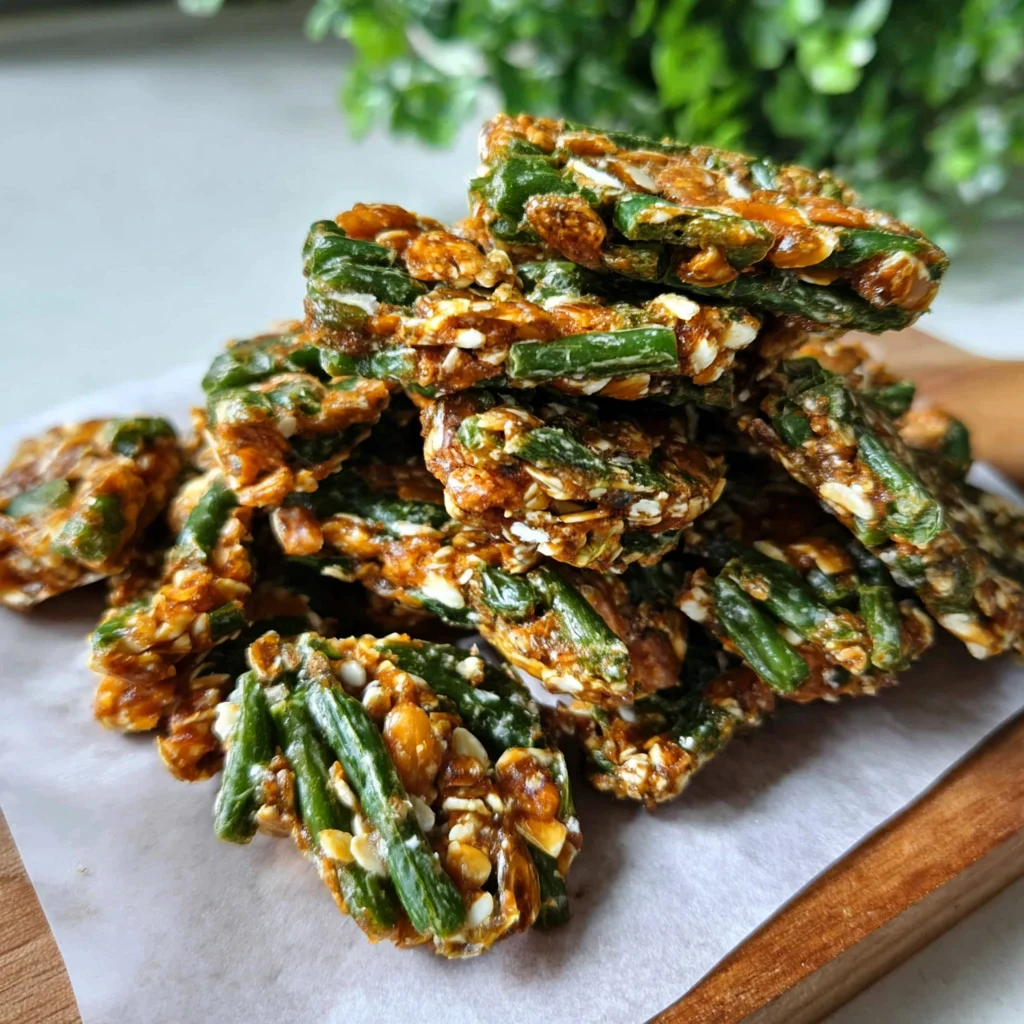
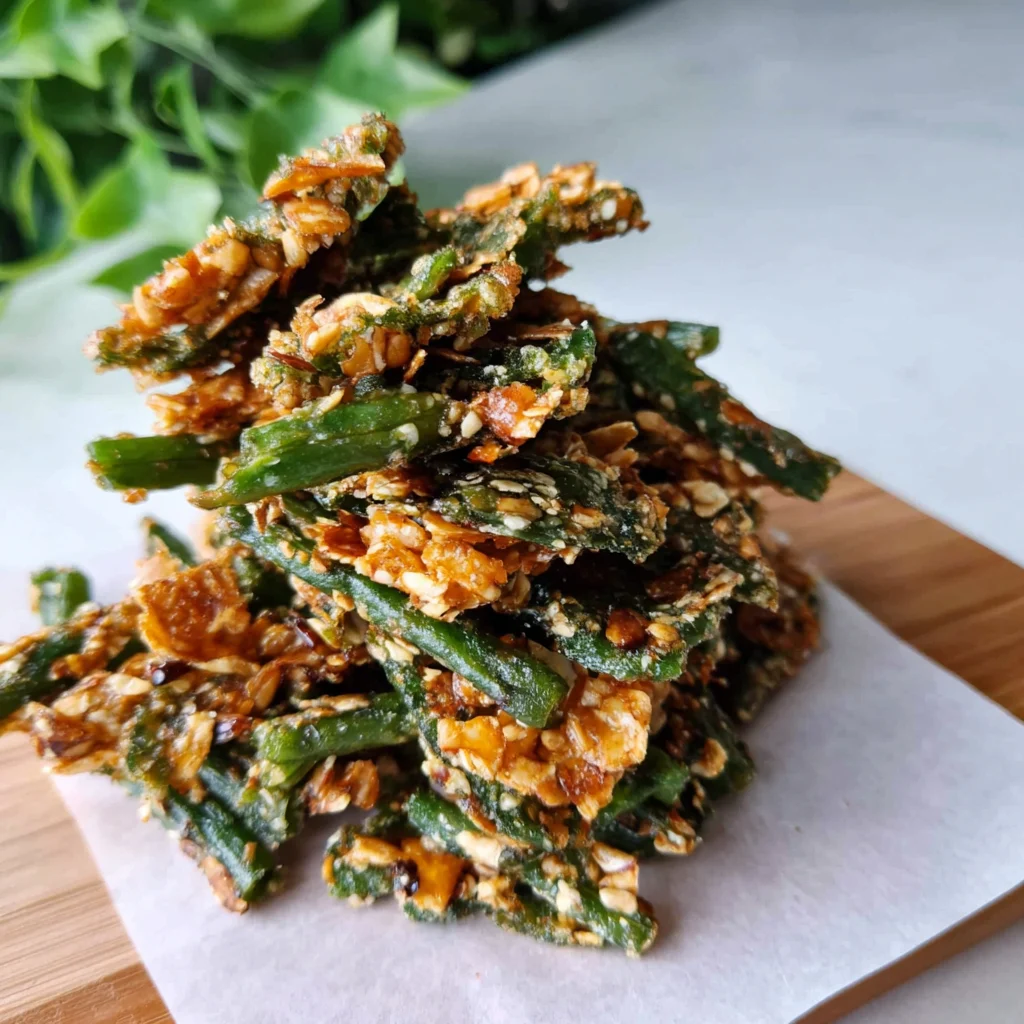
Nothing beats the satisfaction of seeing your furry friend’s tail wag with pure excitement over a homemade treat. These Green Bean and Chicken Crunchies for Dogs combine lean protein with fiber-rich vegetables to create the perfect guilt-free snack. The delightful crunch paired with savory chicken flavor makes these treats absolutely irresistible to our four-legged family members.
Ingredients List
- 2 cups fresh green beans, trimmed and chopped
- 1 pound boneless, skinless chicken breast, cooked and shredded
- 1 large egg, beaten
- 1 cup whole wheat flour
- ½ cup rolled oats, ground into flour
- 2 tablespoons coconut oil, melted
- ¼ cup low-sodium chicken broth
Dog-Safe Substitutions:
- Replace chicken with turkey breast for dogs with poultry sensitivities
- Substitute sweet potato flour for wheat flour if your pup has grain allergies
- Use salmon instead of chicken for omega-3 rich treats
Timing
- Prep Time: 20 minutes
- Cook Time: 25 minutes
- Total Time: 45 minutes
How to Make It
1. Prepare the Green Beans
Start by blanching your fresh green beans in boiling water for 3-4 minutes until they’re bright green and slightly tender. This step is crucial because it makes the beans easier to digest while maintaining their nutritional value. Immediately transfer them to an ice bath to stop the cooking process, then drain thoroughly and chop into small, bite-sized pieces.
2. Mix the Base Ingredients
In a large mixing bowl, combine your cooked, shredded chicken with the chopped green beans. The chicken should be completely cooled to room temperature to prevent the egg from cooking prematurely. Add the beaten egg and melted coconut oil, stirring until everything is evenly coated. The mixture should smell wonderfully savory at this point.
3. Create the Dough
Gradually add the whole wheat flour and ground oat flour to your mixture, stirring continuously. Slowly pour in the chicken broth as needed to bind the ingredients together. The dough should be firm enough to hold its shape but not overly dry. You’ll know it’s ready when it feels slightly sticky but doesn’t stick to your hands excessively.
4. Shape the Crunchies
Preheat your oven to 350°F (175°C). Using your hands or a small cookie scoop, form the mixture into small, uniform balls about 1 inch in diameter. Place them on a parchment-lined baking sheet, leaving about an inch between each treat. Gently flatten each ball with your fingers to create a cookie-like shape that will crisp up beautifully.
5. Bake to Perfection
Bake the treats for 20-25 minutes, or until they’re golden brown and feel firm to the touch. The edges should be slightly darker, and you’ll notice a delightful aroma filling your kitchen. For extra crunchiness, turn off the oven and let the treats sit inside for an additional 10 minutes with the door slightly ajar.
6. Cool and Test
Allow the Green Bean and Chicken Crunchies for Dogs to cool completely on the baking sheet before serving. This cooling period is essential for achieving that perfect crunchy texture your pup craves. Test one yourself – it should break with a satisfying snap and have no soft, chewy center.
Nutritional Information
Each batch provides approximately:
- Protein: 25-30% from lean chicken breast, supporting muscle development
- Fiber: 8-10% from green beans and oats, promoting healthy digestion
- Healthy Fats: 12-15% from coconut oil, supporting coat health
- Vitamins: Rich in Vitamin K, Vitamin C, and B-complex vitamins
- Minerals: Good source of manganese, folate, and potassium
Serving & Storage
These treats are perfect for dogs of all sizes. Offer 2-3 crunchies for small dogs (under 25 pounds) and up to 5-6 for larger breeds as training rewards or special snacks. Remember that treats should never exceed 10% of your dog’s daily caloric intake.
Store the cooled treats in an airtight container at room temperature for up to one week. For longer storage, freeze them in portion-sized bags for up to three months. The crunchies actually maintain their texture beautifully after freezing and thawing.
Common Mistakes
Many pet parents accidentally add salt or seasonings out of habit – resist this urge! Dogs don’t need added sodium, and many seasonings can be harmful. Another frequent mistake is not allowing the treats to cool completely before storage, which creates moisture and leads to soggy, less appetizing crunchies. Always ensure ingredients are at proper temperatures before mixing to prevent bacterial growth.
Conclusion
Creating homemade Green Bean and Chicken Crunchies for Dogs isn’t just about providing a healthy snack – it’s about showing love through nutrition. These treats offer the perfect balance of taste and health benefits that commercial treats often lack. Your pup deserves ingredients you can pronounce and nutrition you can trust. Try this recipe today and watch your furry friend’s excitement grow with every delicious, crunchy bite!
FAQs
Q: Can I use frozen green beans instead of fresh?
A: Absolutely! Frozen green beans work perfectly. Just thaw them completely and pat dry before chopping to remove excess moisture.
Q: How long do these treats stay fresh?
A: When stored properly in an airtight container, these crunchies maintain their texture and freshness for up to one week at room temperature.
Q: Can puppies eat these treats?
A: Yes, but break them into smaller pieces for puppies under 6 months old, and always introduce new treats gradually.
Q: What if my dog has a wheat allergy?
A: Simply substitute the wheat flour with sweet potato flour, coconut flour, or rice flour for a grain-free alternative.
Q: Can I make these treats without an oven?
A: While baking creates the best crunch, you can dehydrate them in a food dehydrator on 160°F for 4-6 hours for similar results.
For more amazing homemade dog treat ideas, check out this fantastic recipe collection that will keep your pup’s tail wagging!
Leave a Reply